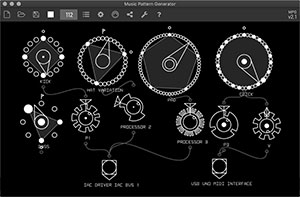
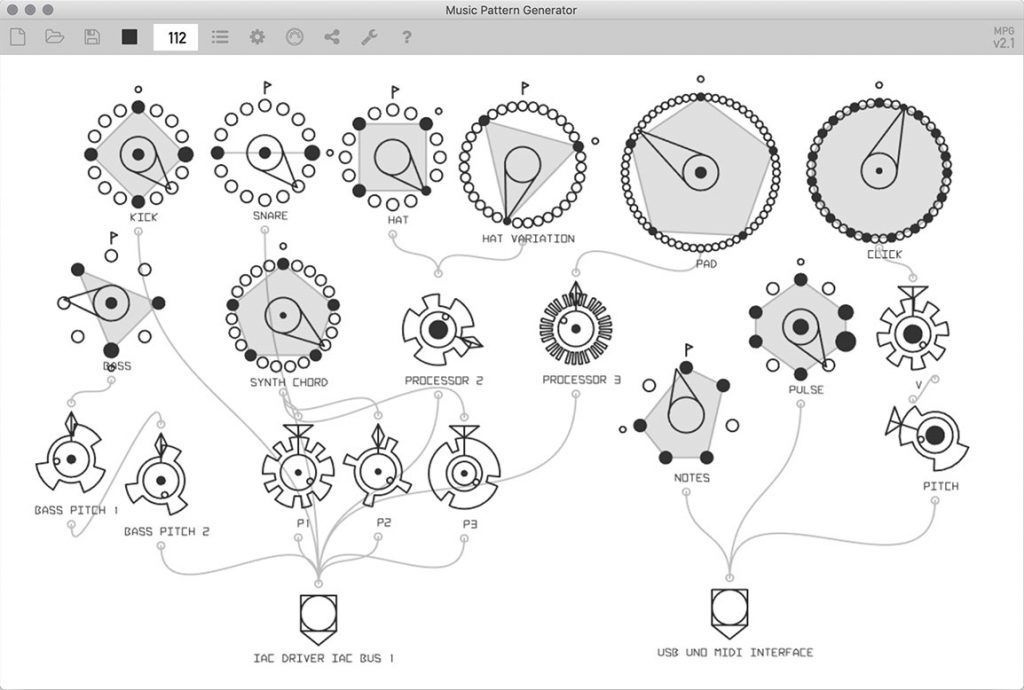
Music Pattern Generator is an app to create musical rhythms. It generates patterns of MIDI notes. It runs online in the browser, or can be downloaded and installed as a desktop application. This article gives an overview of the app and describes how to use it.
How to get the app
You can use the app immediately in a browser that supports Web MIDI such as Chrome or Brave, or download a desktop installer for Linux, Mac or Windows.
The app online: www.hisschemoller.com/mpg
Desktop version: Music Pattern Generator GitHub releases page
Source code: github.com/hisschemoller/music-pattern-generator
This tutorial video shows the basics of version 2.1 including how to assign MIDI controllers.
Processors
Music Pattern Generator has a modular setup. Modules are called processors and are connected to form a network. Processors can produce MIDI notes, transform incoming data or send notes to MIDI output ports.
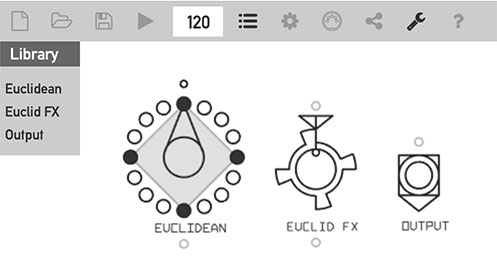
Three types of processors are available at the moment:
- Euclidean generates euclidean rhythms
- Euclid FX transforms incoming MIDI notes
- Output sends notes to MIDI output ports
Processors are created by dragging them out of the Library into the main area of the app.
Connections
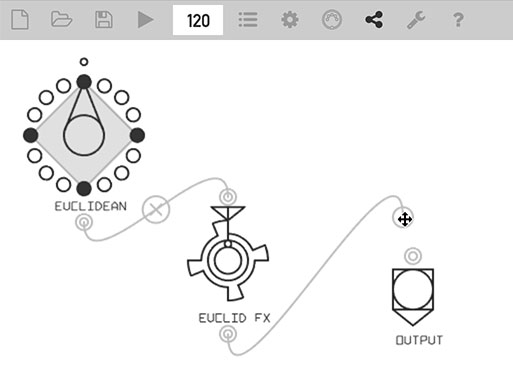
Processors have their input at the top and output at the bottom. Connections are made by dragging a cable from the output of one processor to the input of another. The app must be in ‘Connection mode’, which is enabled by clicking the Connections button in the top Control Bar.
A single output can connect to multiple other processors’ inputs. Just drag as many cables as you want out of the output. Similarly, an input can receive data from multiple outputs.
Connection cables can be deleted by clicking the Delete button that shows halfway each cable when in ‘Connection mode’.
The Euclidean processor
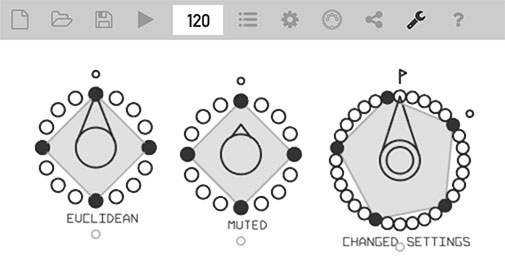
The Euclidean processor generates rhythm patterns using the Euclidean algorithm.
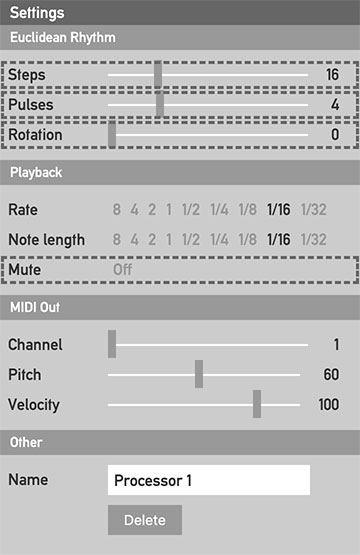
Each processor has it’s own editor panel to change its settings. Click the ‘Editor’ button in the Control Bar if the panel isn’t visible. The editor always shows the settings of the selected processor. Select a processor by clicking its center circle. The processor will show a double ring to indicate it’s selected.
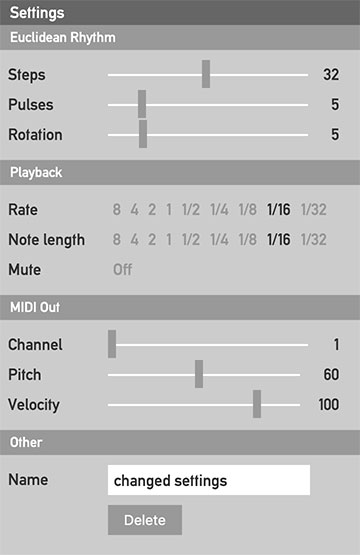
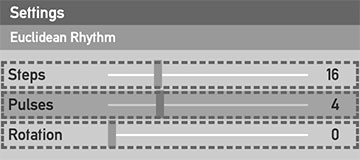
This editor panel shows the settings for the rightmost processor in the image above.
The top three settings – steps, pulses and rotation – produce the actual pattern. Play with them and you will get a feeling for the results and what they do.
Rate sets the musical timing of the pattern. At ‘1/16’ each step will take a quarter beat as set in the ‘Beats Per Minute’ input in the Control Bar. The number must be understood a part of a whole measure where one measure lasts four beats. Just try and you’ll understand.
Note Length uses the same timing as rate. It’s generally best to not set it higher than the rate or notes will overlap and produce usually unwanted results.
The other settings are self explanatory.
The Euclid FX processor
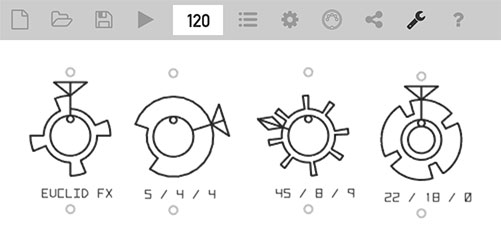
The Euclid FX processor transforms incoming MIDI notes and sends them out of the output.
It changes a MIDI note in one of two possible ways. A Euclidean pattern decides which of the two ways.

This editor panel shows the settings for the rightmost processor in the image above.
Most settings are exactly the same as in the Euclidean processor editor. The only real difference here is the Effect section.
- The Target sets which property of the MIDI notes will be changed.
- Low value sets the value when the pattern is between pulses.
- High value sets the value when the pattern on a pulse.
- Mode sets the way the new values are applied:
- Absolute mode overwrites the incoming data,
- Relative mode adds to the incoming data.
An Example
This is the case in the image above. The target is Velocity and mode is Absolute. Now the velocity of the incoming MIDI notes will be changed to 50 or 100, depending on the state of the pattern at the moment the note arrives. It’s previous velocity value is lost.
Another example
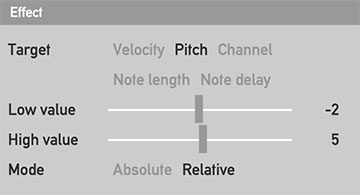
The target here is Pitch and the mode is Relative. Depending on the state of the pattern at the moment a note arrives, a value of 2 is distracted from the pitch or 5 is added. Lets say incoming MIDI notes have a pitch of 60, then they will be changed to 58 (60 – 2) or 65 (60 + 5). Or in musical terms, notes arrive in C, and are turned into either Bb or F.
The Output processor
The output processor sends incoming MIDI out of the app to a MIDI port.
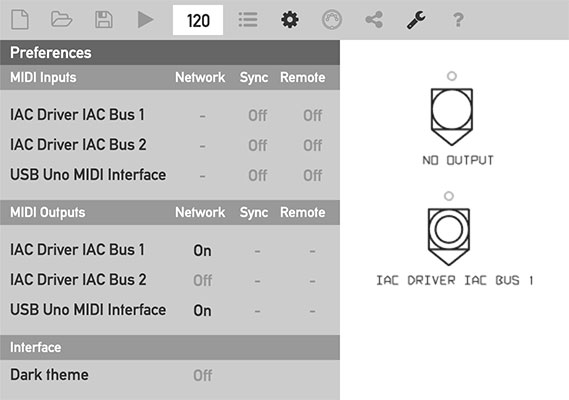
Only MIDI ports that are enabled in the Preferences panel can be used as an output. Click the ‘Preferences’ button in the Control Bar to open the Preferences panel. Then in the Network column enable all MIDI outputs you want to use. As shown in the image above.
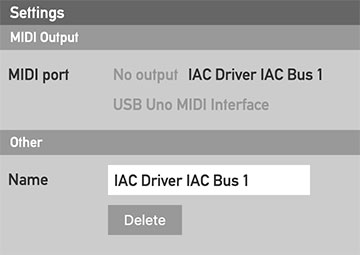
In the processor’s editor panel select an output in the list of MIDI ports. Or No Output to stop the port from sending data.
Multiple Output processors can be added in a single project to send MIDI to multiple ports.
The Preferences panel

The preference settings are saved separately from a project, so they will persist when switching between projects or when creating a new one.
MIDI Inputs
Only the Remote column is active for the MIDI inputs. When MIDI controllers are used for automation, the app only listens to MIDI Continuous Control data on inputs that have Remote enabled. The section about MIDI learn and MIDI automation follows below.
MIDI Outputs
Only the Network column is active for the MIDI outputs. The outputs that have Network enabled can be used by the Output processors to send MIDI data to. See the section about the Output Processor above.
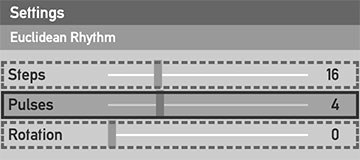
Interface
The dark theme might be easier on the eye in low light environments.
MIDI Remote Control
Several processor settings can be remote-controlled with an external MIDI controller that sends Continuous Control (CC) messages.
To use a MIDI input port for remote control, the input must have its Remote option enabled in the Preferences panel. See above for an overview of the Preferences panel.
MIDI learn mode
To set up remote control, MIDI controllers must first be assigned to processor settings. This is done in ‘MIDI Learn’ mode.
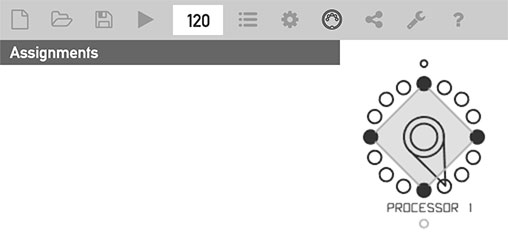
MIDI Learn is enabled by clicking the ‘MIDI Learn’ button in the top Control Bar. The Assignments panel appears, which initially is empty and only shows its title bar.
At the same time the editor panel shows a dashed border around each setting that can be remote controlled.
Assigning MIDI Controllers to processor settings
To create an assignment first click on the setting that you’d like to control via MIDI. The setting will show a darkened background to indicate it’s ready to receive MIDI data.
Now turn a knob on your hardware controller that sends MIDI CC data. When the data is received the asignment is immediately made. The settings border turns from dashed into a solid line to indicate that the setting is assigned for remote control.
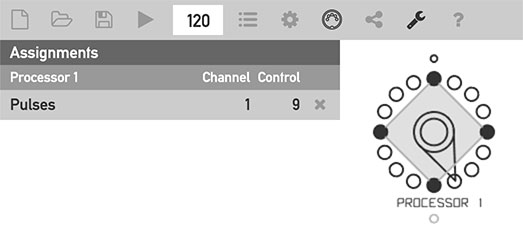
At the same time the assigment appears in the Assignments panel.
To remove an assignment click the delete (x) button at the right of the assignment in the list.
To actually use the remote control, exit MIDI Learn mode by clicking the ‘MIDI Learn’ button again. Now the assigned controller will control the processor setting. You’ll see and the processor graphic and editor setting follow the incoming MIDI data.
The Control Bar

The controls, from left to right
- New project
- Open a project JSON file
- Export a project to JSON file
- Play / Pause toggle
The tempo number input, to set the tempo in Beats Per Minute (BPM)
- Library
- Preferences
- Assignments
- Connections
- Settings Editor
- About
Leave a Reply